
As part of your Sapelli project, it is likely that you will want to create icons for your choices, in order to help your user navigate through the project.
There are a number of ways of doing this, depending on what you would like your icons to look like.
This page will cover:
Using images from the internet
Using photographs
One of the easiest methods is to take photographs or use your own pre-existing photographs for icons.
It is best to select photos which clearly show the image you want to use as your icon, without too much detail in the background.
You can resize images using an online tool such as Bulk Resize
Hand drawing icons
Hand drawing icons is a useful way of creating images for Sapelli projects. Hand drawing icons gives you the opportunity to involve your users in the creation of the icons, and enables you to highlight specific identifying features in the icons (see “Suggestions for identification” below).
The steps for turning your hand-drawn pictures into icons are as follows:
Step 1
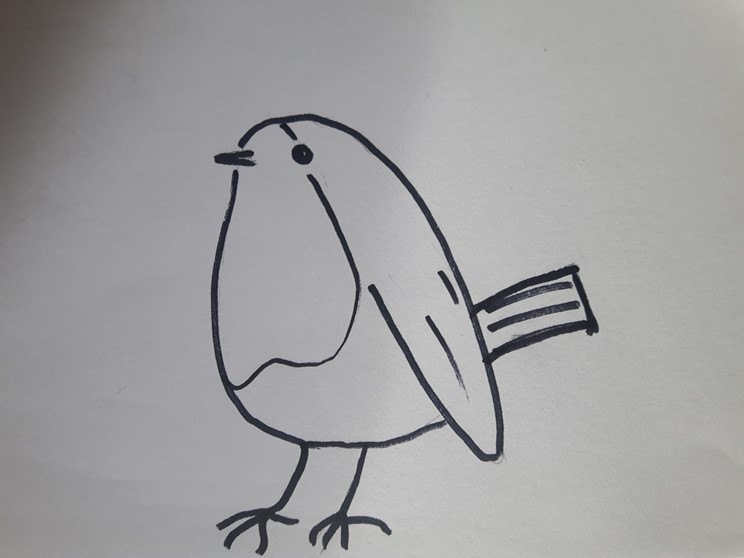
Draw your image on plain, white paper if possible. Making sure you use thick outlines to make it clear. You can add colour at this stage, if you wish and it helps for identification. We will also look at adding colour to the image digitally below.
We’ll use the example of a robin.
Step 2
Take a photo of your picture, using natural light and trying to ensure there are as few shadows on it as possible. You can also scan the image if you have a scanner.
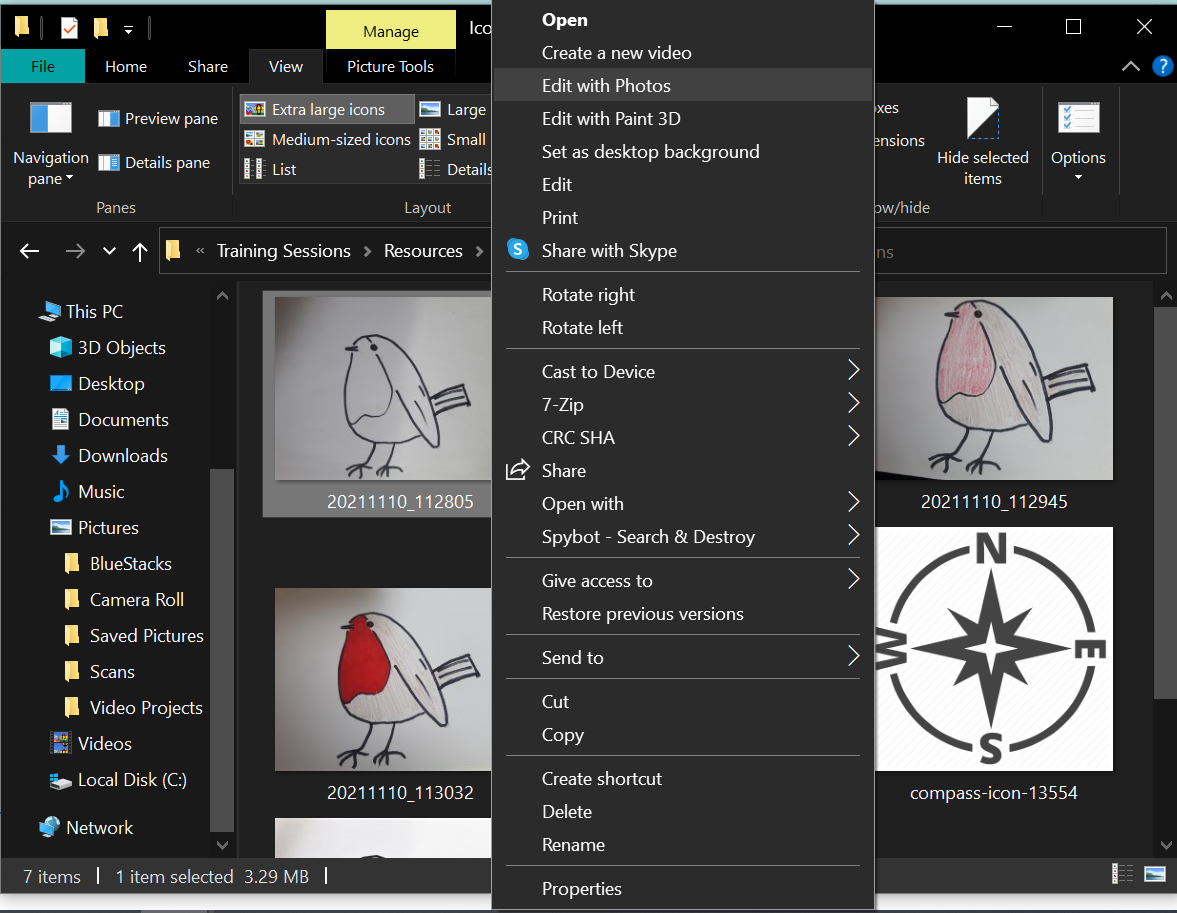
Step 3
You now have a few different options of how to edit your image. Once you have got the image onto your computer, you can use the built in editing tools to change the brightness/contrast of the image. These are usually found by right clicking on the image and selecting “Edit Photos”
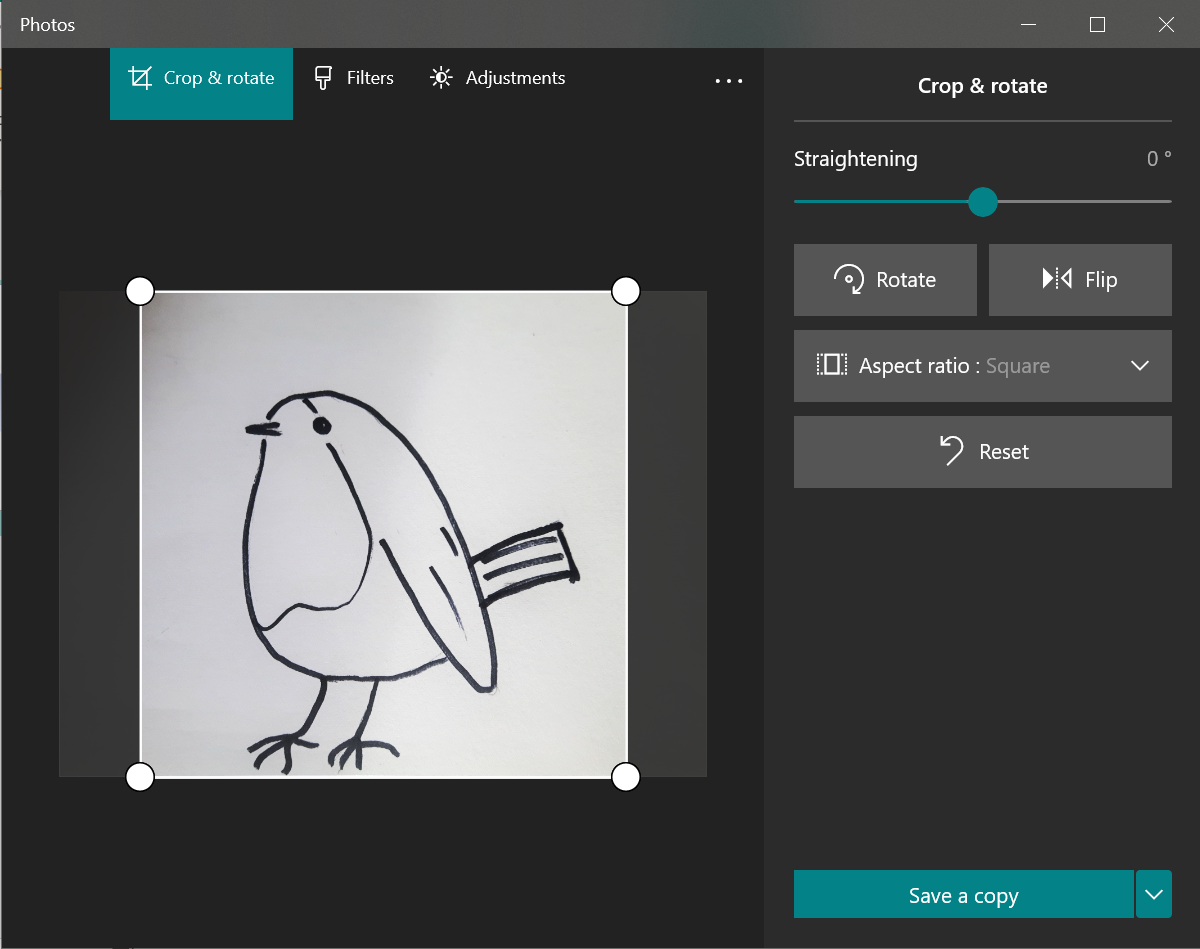
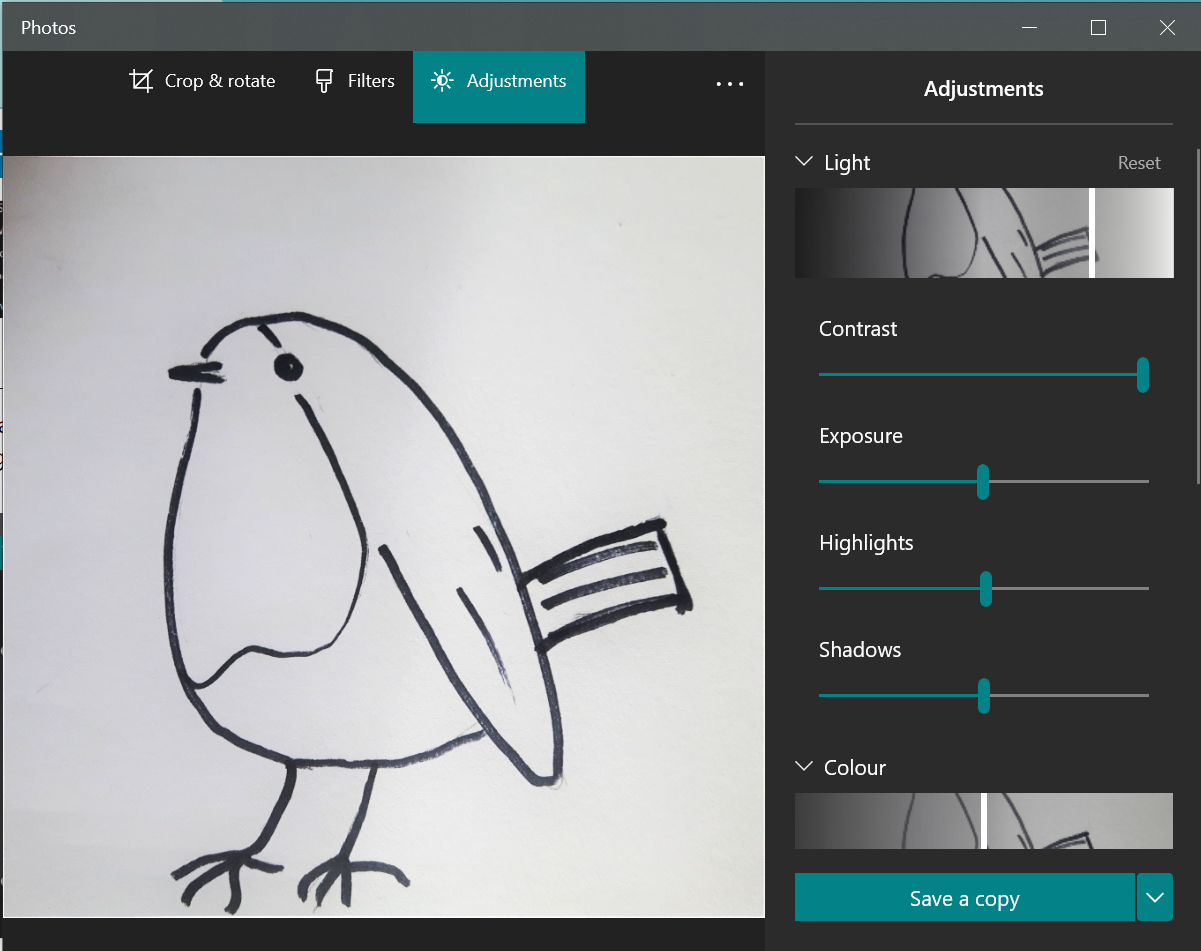
You can then crop the photo to a square using the “crop and rotate” tab and setting the aspect ratio to a square, and change the brightness and contrast to make the image more clear. Try changing these settings to see what works for your image:
If there are elements in your image that will help your users to identify what it signifies, follow the steps outlined below in the section “Adding identifying features”.
Adding identifying features
You may wish to add colour or augment images to highlight the most important areas. You can use online software such as OnlinePNGTools (https://onlinepngtools.com/change-png-color) or an image editing software, such as Paint. Most computers will have this as standard. This method works best for very simple icons without many details.
Open Paint. Click on “File” and then “Open” and locate the image on your computer to open it.
Adding colour
Step 1: If you try to fill in an area of the image immediately, you will see that only individual pixels get filled in. To fill in a whole area, select the “free-form select” tool and use this to draw around the areas of the image you wish to remove:
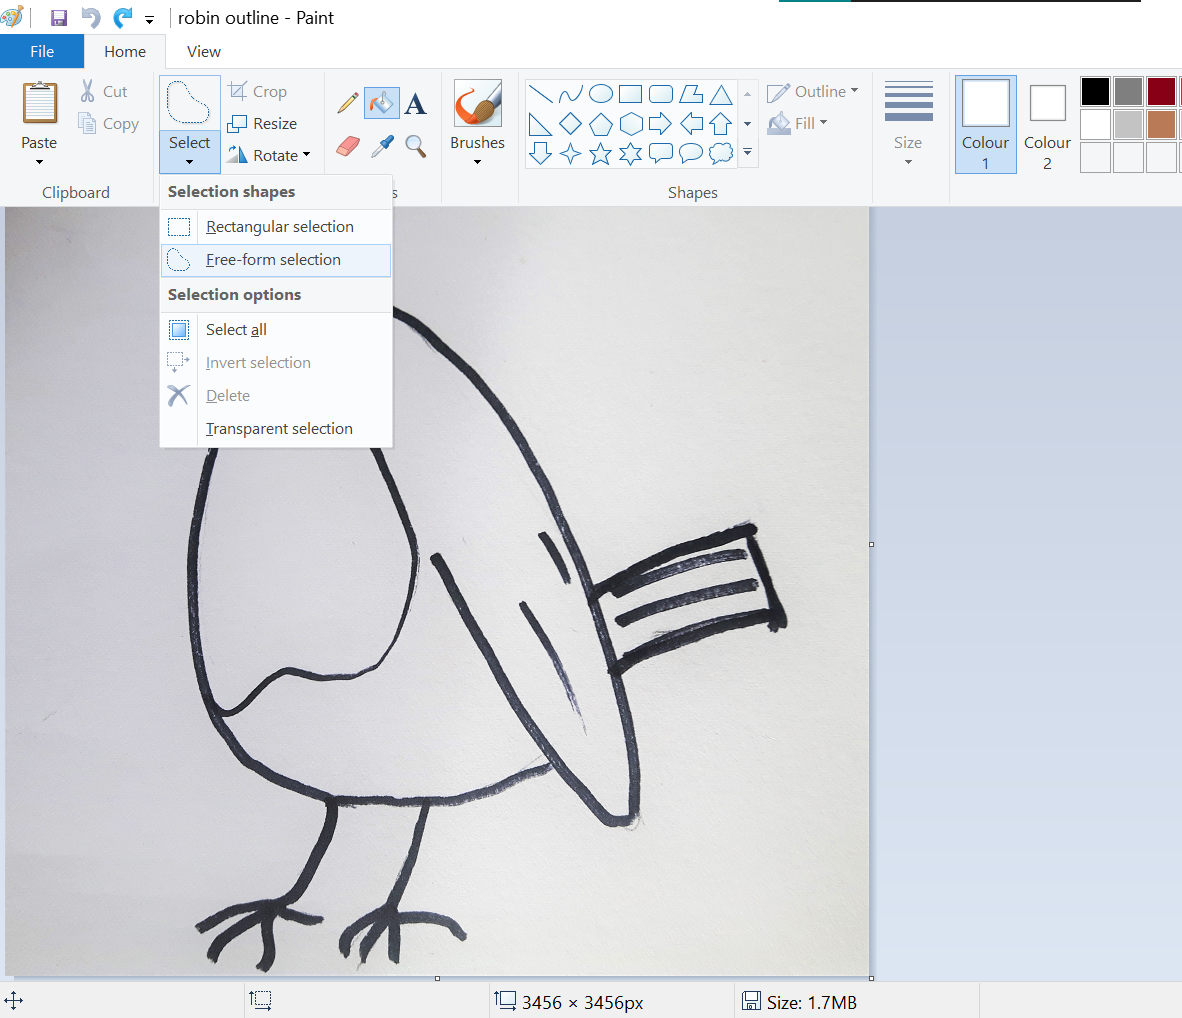
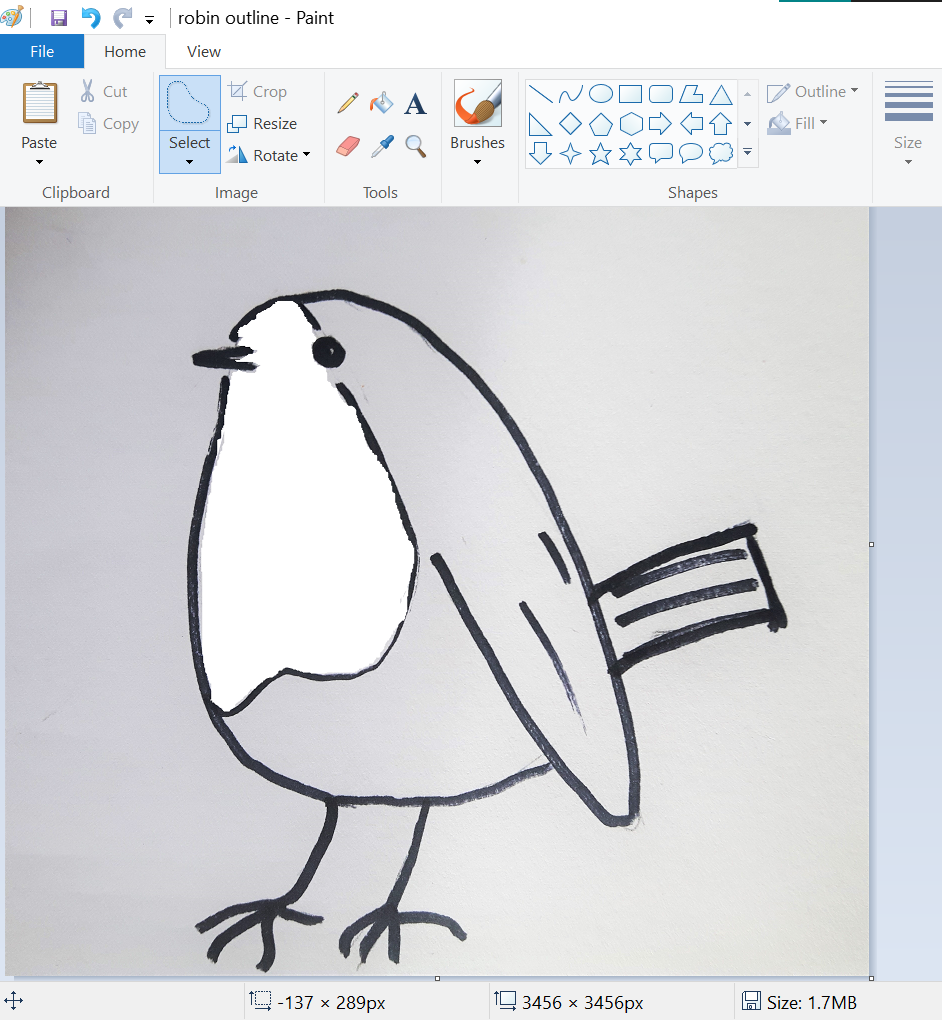
Step 2: Hit delete and the area you have drawn around will be removed:
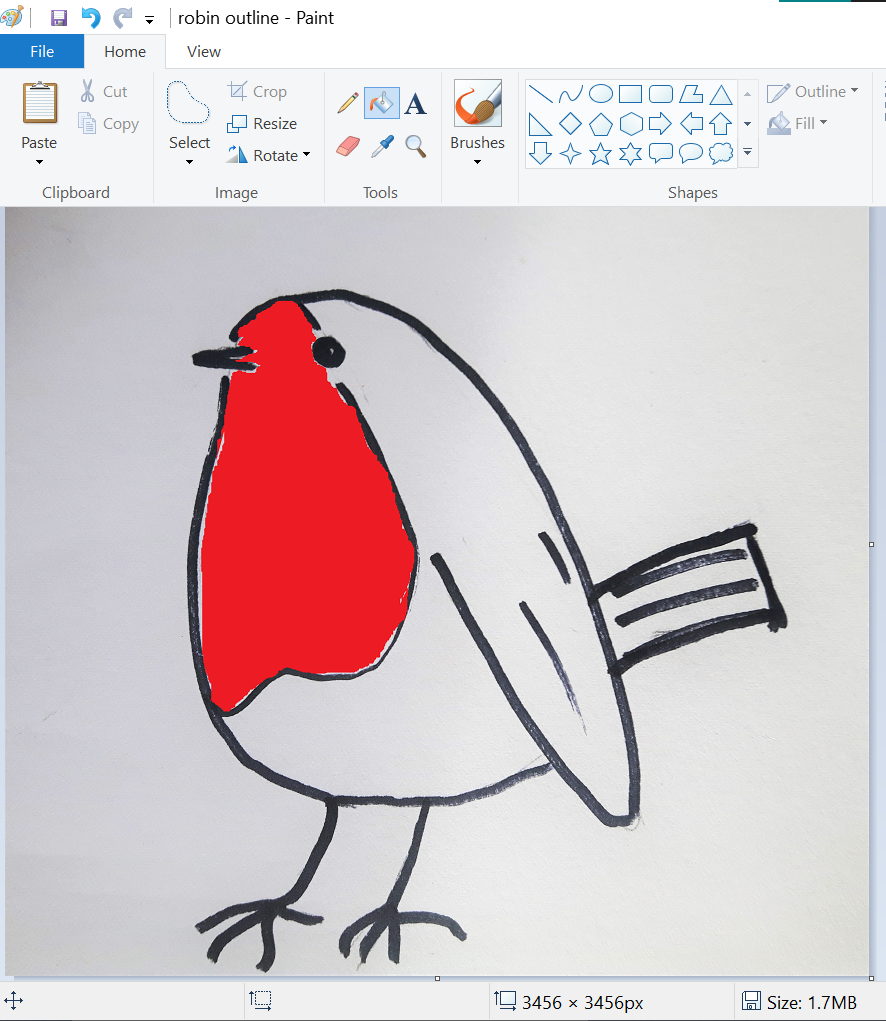
Step 3: Now select the colour you wish to fill the area with by clicking on it on the colour panel, and select the “fill” icon, which looks like this:

Click on the area you wish to fill and it should turn out like this:
Sometimes colour fills into areas that we do not wish to colour. To avoid this make sure that all of the outlines surrounding the area you wish to fill with a new colour are joined up to create an enclosed area.
Once you have finished save your image as a JPG or PNG file.
Augmenting features
Sometimes you may need to augment part of an image to highlight the differences between it and another icon.
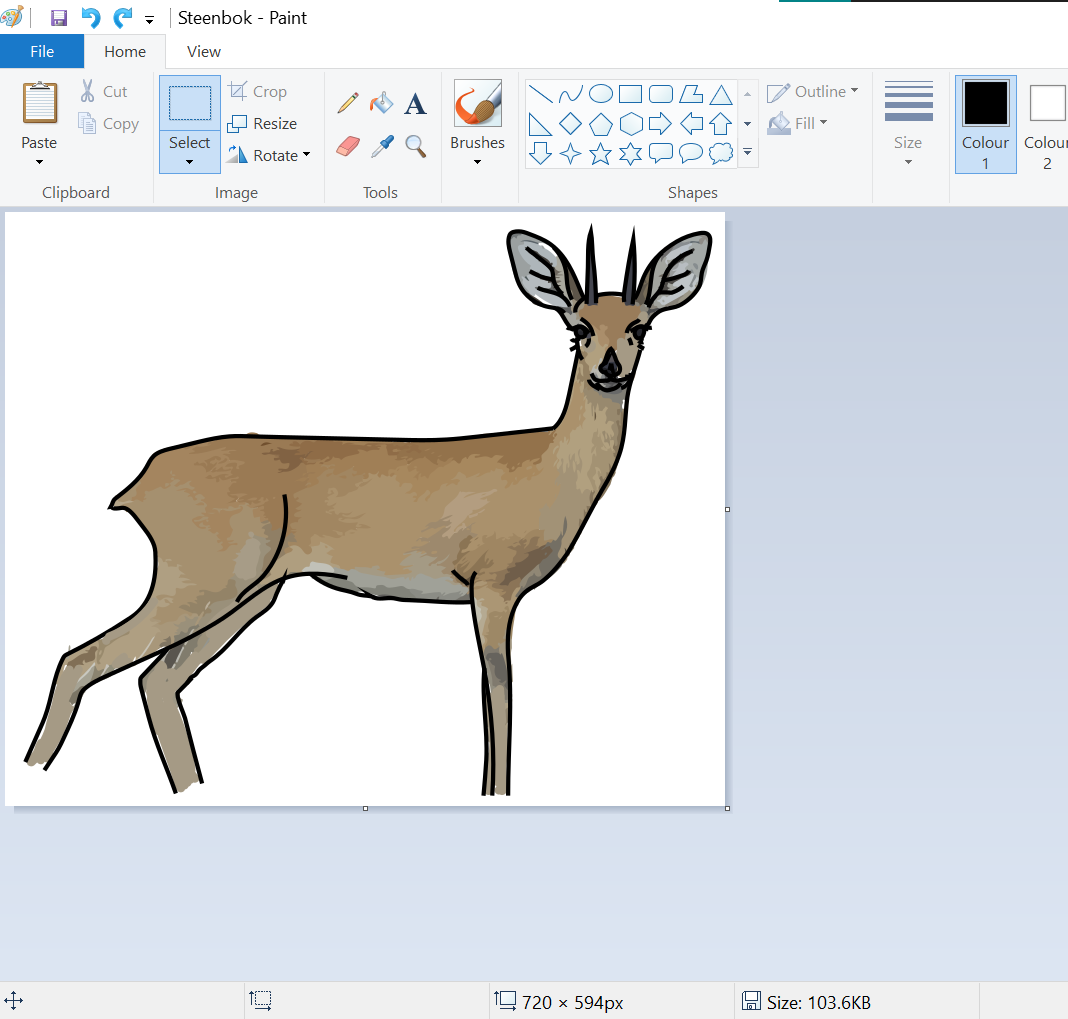
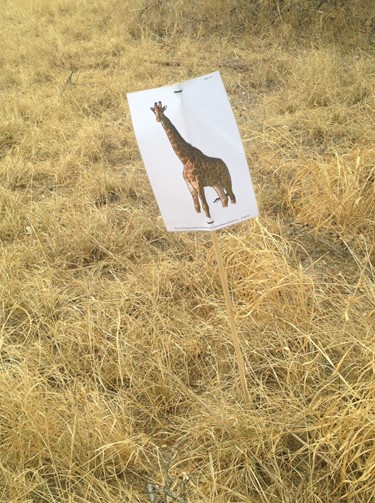
We’ll use this image of a Steenbok as an example. It has large ears, which helps us to identify it next to other, similar animals.
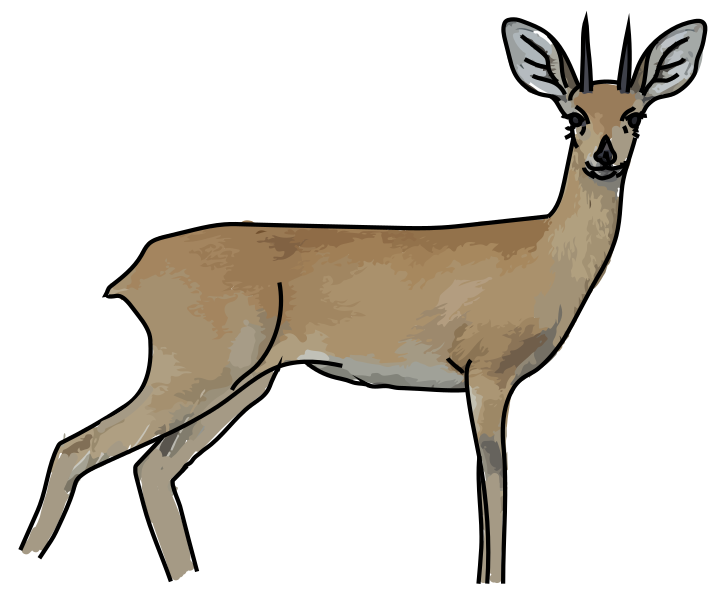
To make it obvious that it is a Steenbok, we are going to emphasise its large ears.
Step 1: Open Paint. Click on “File” and then “Open” and locate the image on your computer to open it.
Step 2: If you need more room, as we will here to fit in the ears, resize your canvas by clicking on the bottom corner and dragging. Then, using the rectangular selection tool, select the whole image and move it to the centre of the canvas, or wherever it needs to be to give enough space for the image you want to produce.

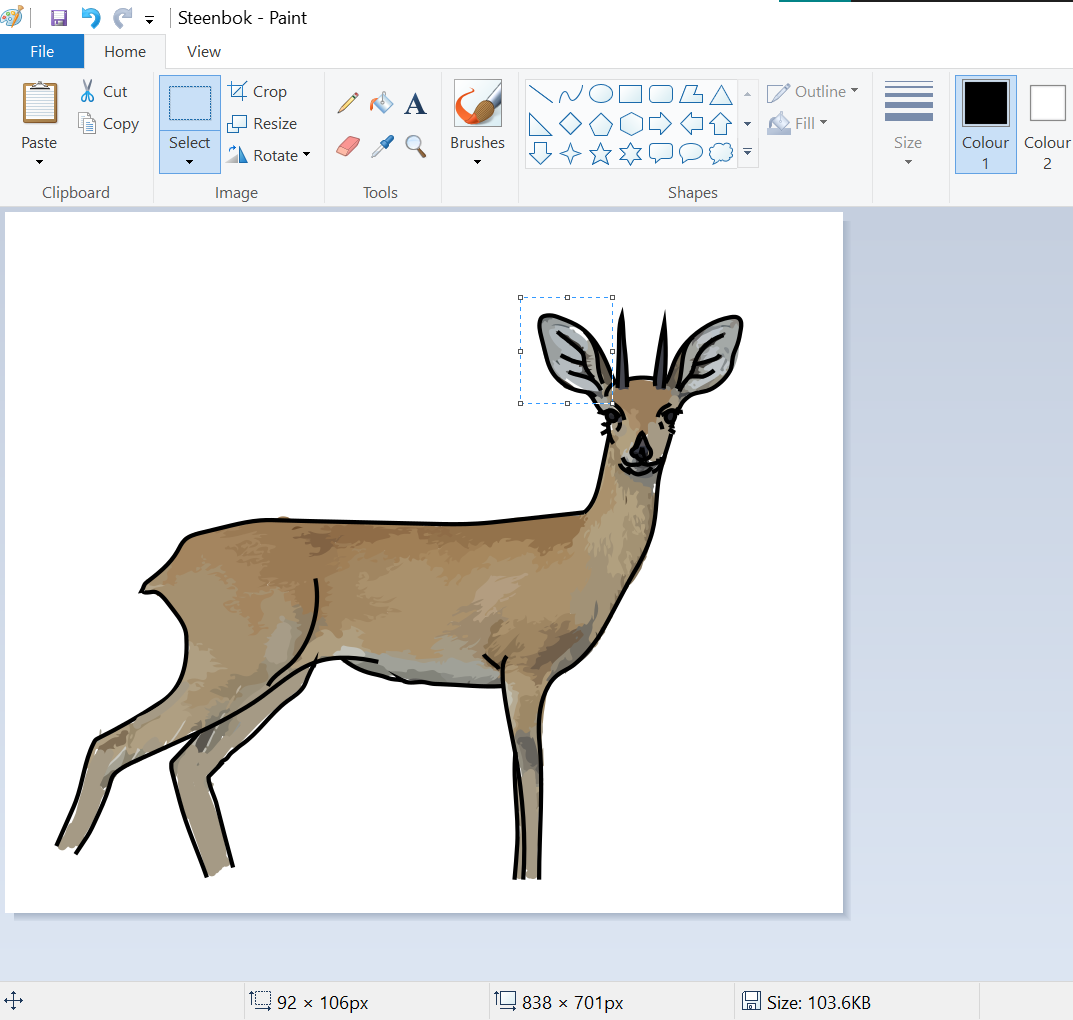
Step 3: To resize the ears, click on “Select” and choose the type of selection tool you wish to use. The free-form selection tool will provide the most flexibility, particularly if the area you wish to emphasise overlays another part of the image. In this case, we can use the rectangular selection tool as the ears stick away from the head.
Step 4: Draw around the area you wish to emphasise.
Step 5: Now resize the ears by clicking on a corner of the selection and dragging until they reach the correct size.
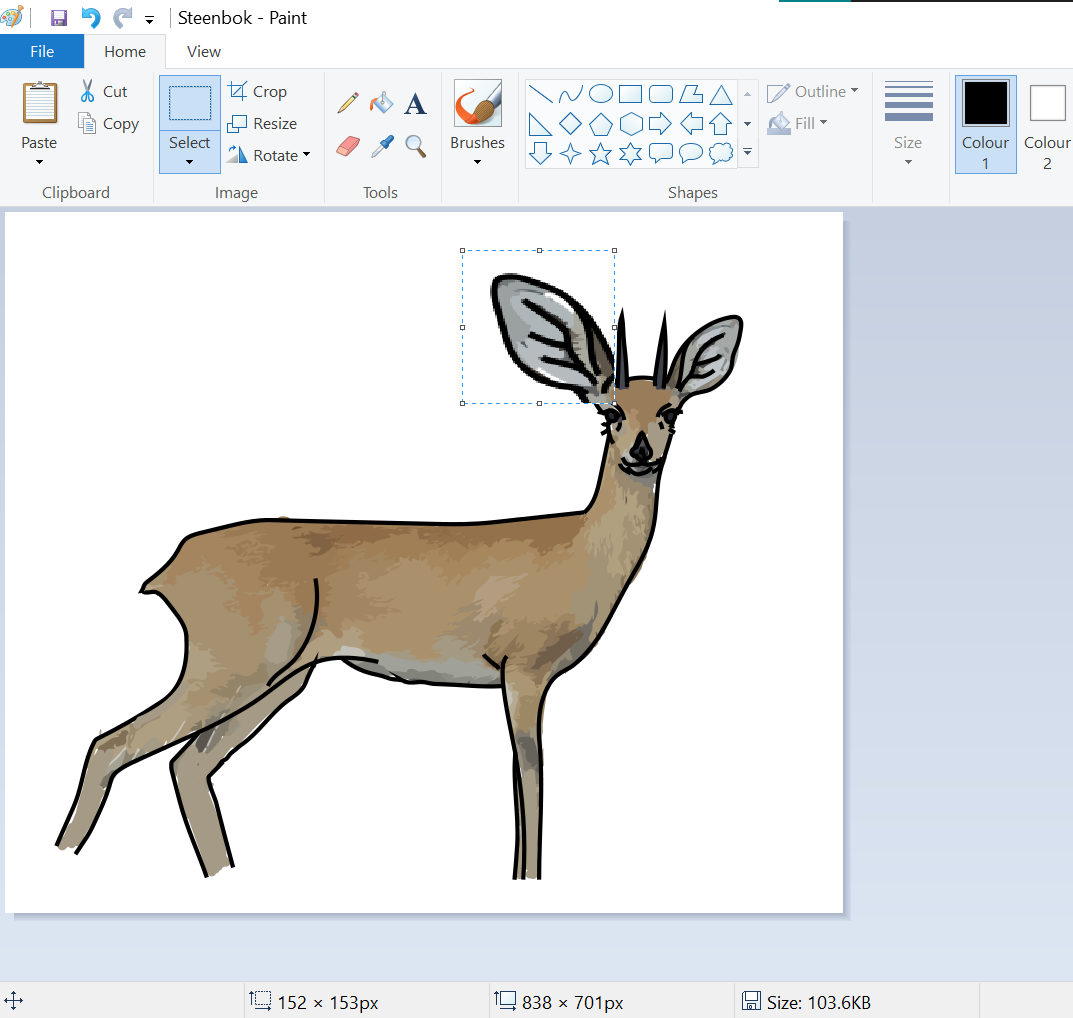
You can also move the selection around to make sure the image remains coherent.
Repeat these steps if necessary, to make sure you have changed all the elements of the image that need to be emphasized.
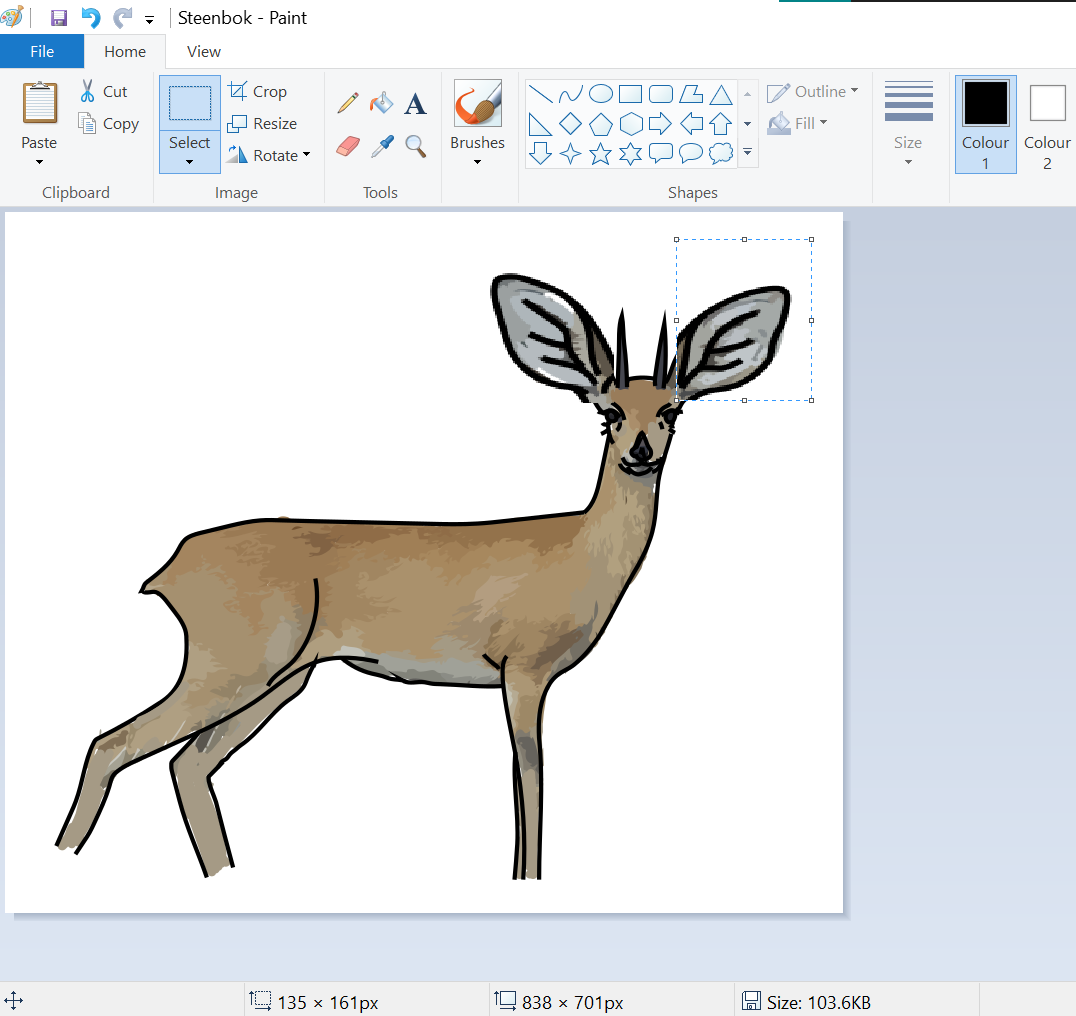
Once you have finished save your image as a JPG or PNG file.
Using images from the internet
Google images can be a good source of icons and photographs for your project.
When using Google Images to search for images, make sure that you select images that are shared under Creative Commons licenses. This means the images are free to use.
To do this, go to google images and search for the image you want to use.
Click on Tools, under the search bar on the right hand side, and under “Usage Rights” select “Creative Commons licenses”
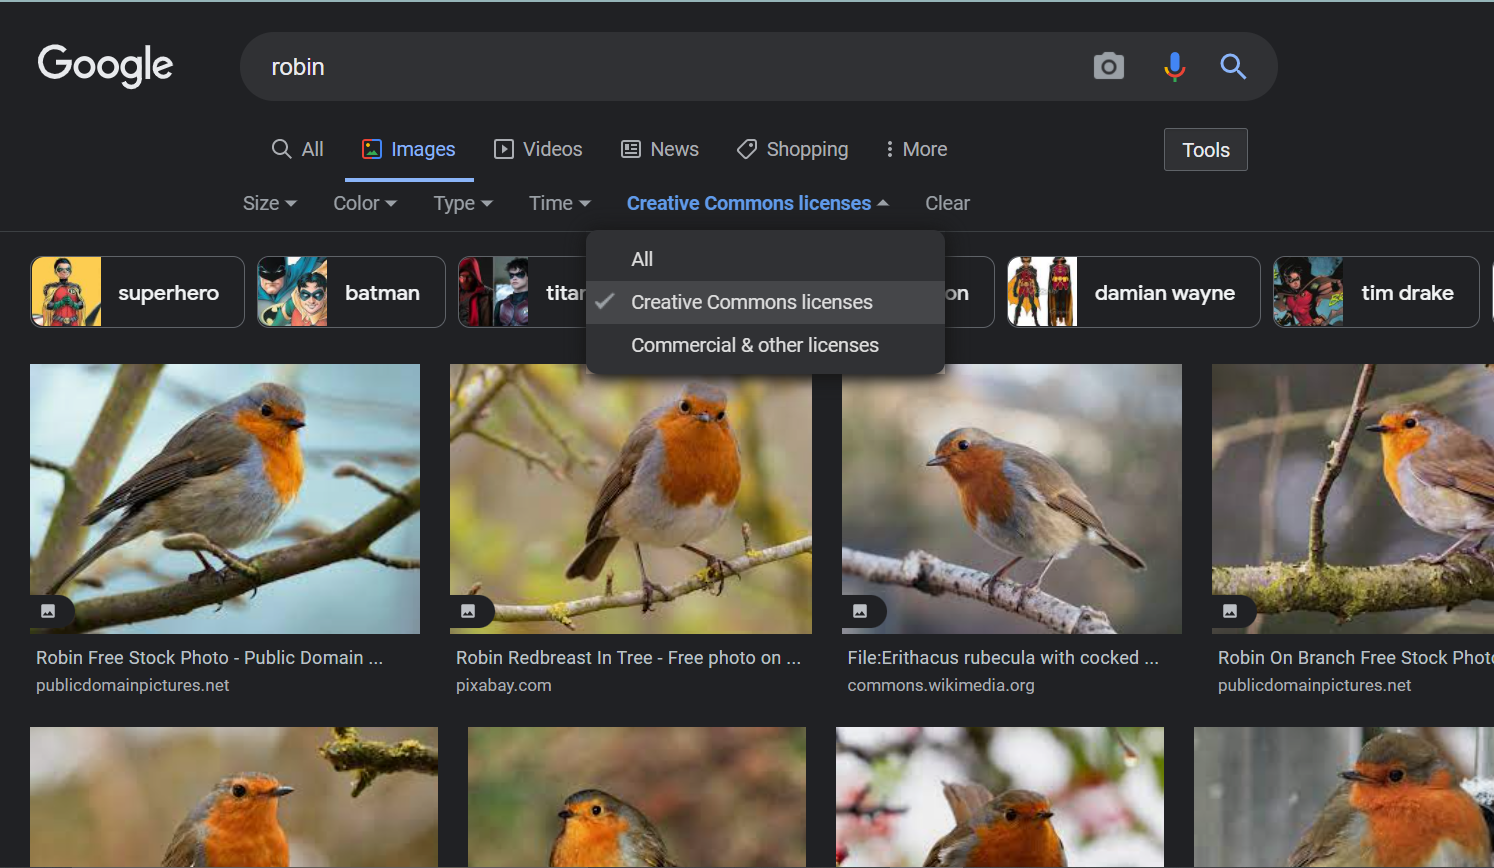
Go to the image you wish to use, right click on it and select “Save Image As…”
You can then give it a name, and select the type of image you wish to save it as (PNG or JPEG) and save it to your computer.
Testing icons with your users
It is important to test the icons you create to make sure that your users understand what they mean.
There are a couple of ways of doing this, which are laid out below. It is a good idea to do both exercises to test participant understanding.
Group Exercise
Step 1: Print out your images, if it is possible to, or use the hand drawn icons you have created. In some cases you may be able to show your images on a laptop or phone, but this activity works best with printed materials.
Step 2: Gather your users together in a group and explain that you will be testing out if the icons you have created are easily identifiable.
Step 3: Hold up each image in turn and ask your users to shout out what they think the image represents at the same time.
Step 4: If there is disagreement about what an image signifies, discuss what changes could be made to make it more clear.
Once you have made those changes, repeat the exercise.
Individual Exercise
Step 1: Print out your images, if it is possible to, or use the hand drawn icons you have created. In some cases you may be able to show your images on a laptop or phone, but this activity works best with printed materials.
Step 2: Lay out the images and ask individuals to tell you what they think the images are.
Step 3: You can also use an audio recorder and invite your participants to record the names of the images. These can then be used to create audio files that can help your users navigate through your Sapelli Project.
For more on this, see: 5.6.4. Adding Audio Description.