
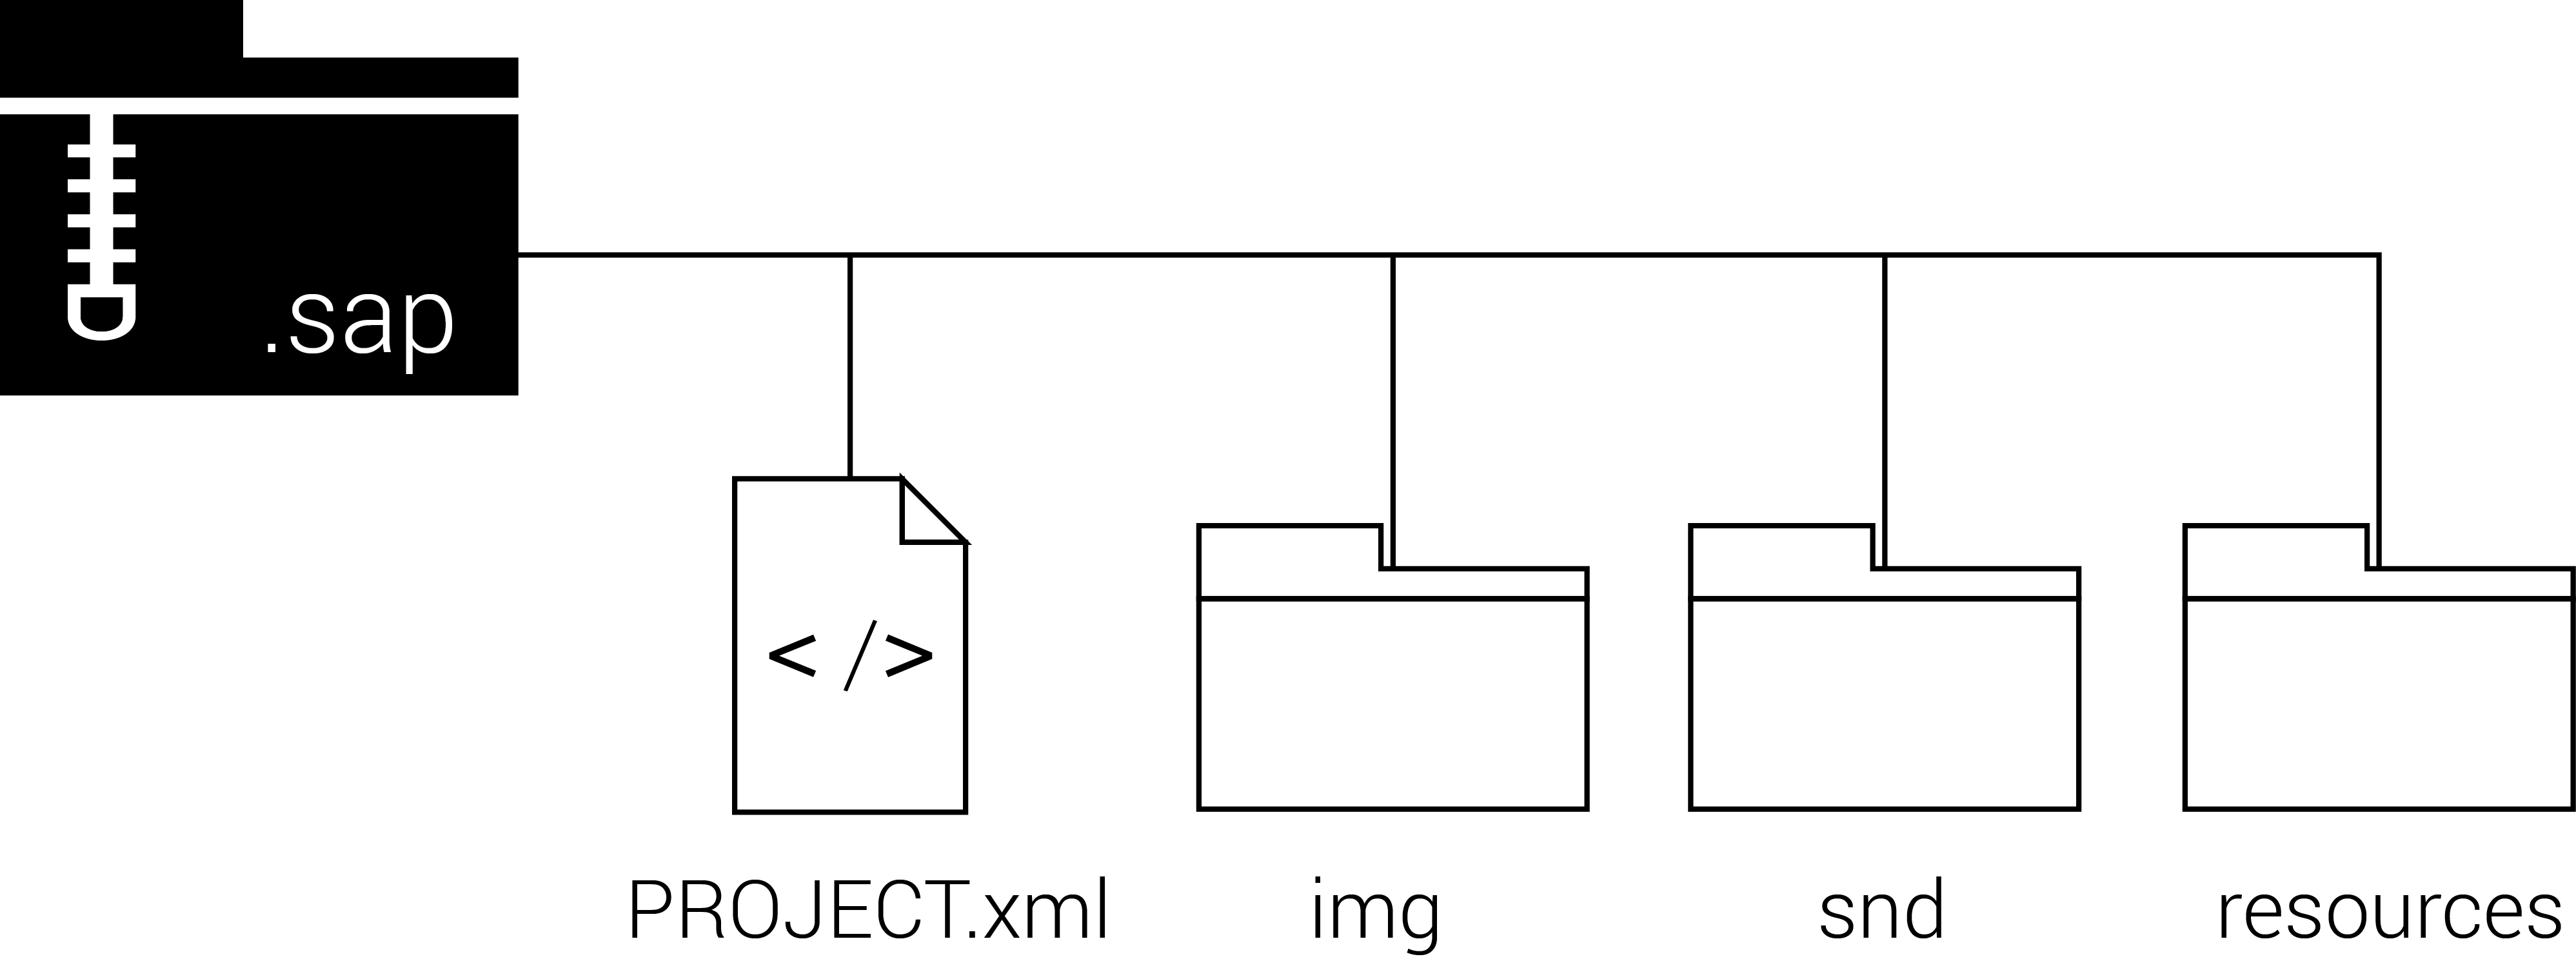
PROJECT.xml
A PROJECT.xml file is the skeleton of a project as it defines the screen layout as well as the data to be captured. The next section will describe how to create a PROJECT.xml file.
Image folder
An image folder ‘img’ will contain any images, icons or logos you may wish to use within the design of your screens. For example, if your project will use images rather than text to guide a user through the decision tree, then those images will be stored in the ‘img’ folder. Equally, if you wish to display custom icons, such as ‘start video recording’ and ‘stop video recording’ icons, then they too will be stored in this folder.
Sound folder
A sound folder ‘snd’ can also be included if you would like the project to have any sound effects.
Resources folder
The resources folder will contain any HTML, CSS and/or JavaScript files that you may want your project to have. These files are useful if you want information in the app to be displayed as a webpage. For more detail see the HTML section of this tutorial. Any images, videos or PDF files that you wish to include in your HTML page will also be saved within the resources file.
Zipping the Sapelli project together
Sapelli projects are ZIP files which have been renamed to .sapelli or .sap. Therefore, you will need to install a software on your computer that can ‘zip’ and ‘unzip’ folders. Popular software to do this is 7-Zip for Windows users or iZip for Mac users. Once you have the software, zip together the PROJECT.xml along with any of the additional folders you may have. Once zipped, delete the extension “.zip” and rename it to either “.sapelli” or “.sap”. If you are a Windows user and you can see the .zip file extension, follow these instructions to enable file extentsons. Now your project is ready to load onto the app (see Load an example project).