
What is GeoKey
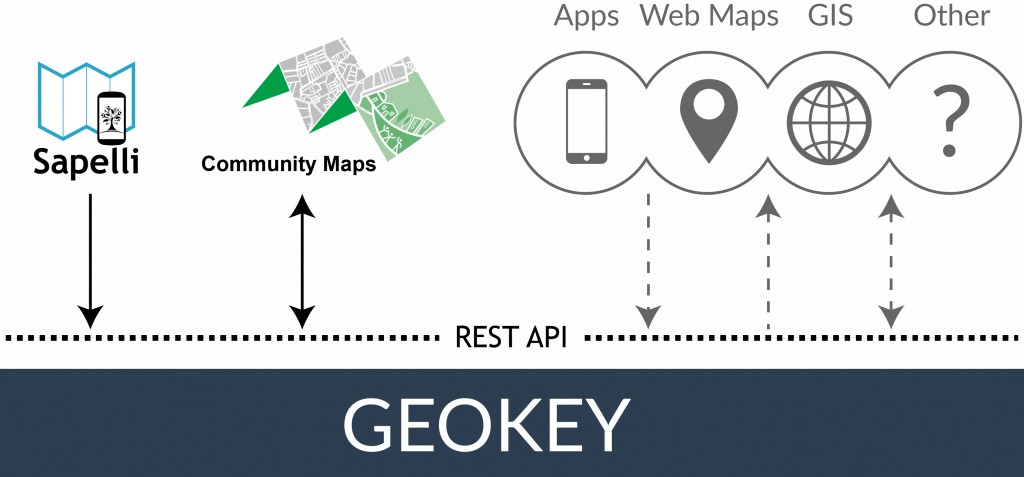
GeoKey has been developed by UCL ExCiteS and Mapping for Change as a web-based, open source platform that serves as a connecting point between data collection and data utilisation through analysis and visualisation. GeoKey provides a platform for participatory mapping that is focused on providing a server-side infrastructure to receive, store and disseminate geographic data collected by citizens. Sapelli integrates with GeoKey through its open REST API.
Install GeoKey with Sapelli Extension
GeoKey’s open source code can be found here. Instructions are provided that walk you through the process of setting up GeoKey on your own server, running a Debian or Ubuntu Linux distribution. It explains how to setup the database, how to install the Python packages and what configurations you should implement to make GeoKey run smoothly. In order to connect to GeoKey from a Sapelli client, the Sapelli extension needs to be installed. The source code with installation instructions can be found here. If self-hosting is not an option you can get in touch with us by sending an email to: info@mappingforchange.org.uk
Set up Sapelli project in GeoKey
Once you have finished the installation or got access to a server running GeoKey, you need to create a user account.
NOTE: To send data from Sapelli, do not sign up with a social media account, but instead use the option to register with an email address:
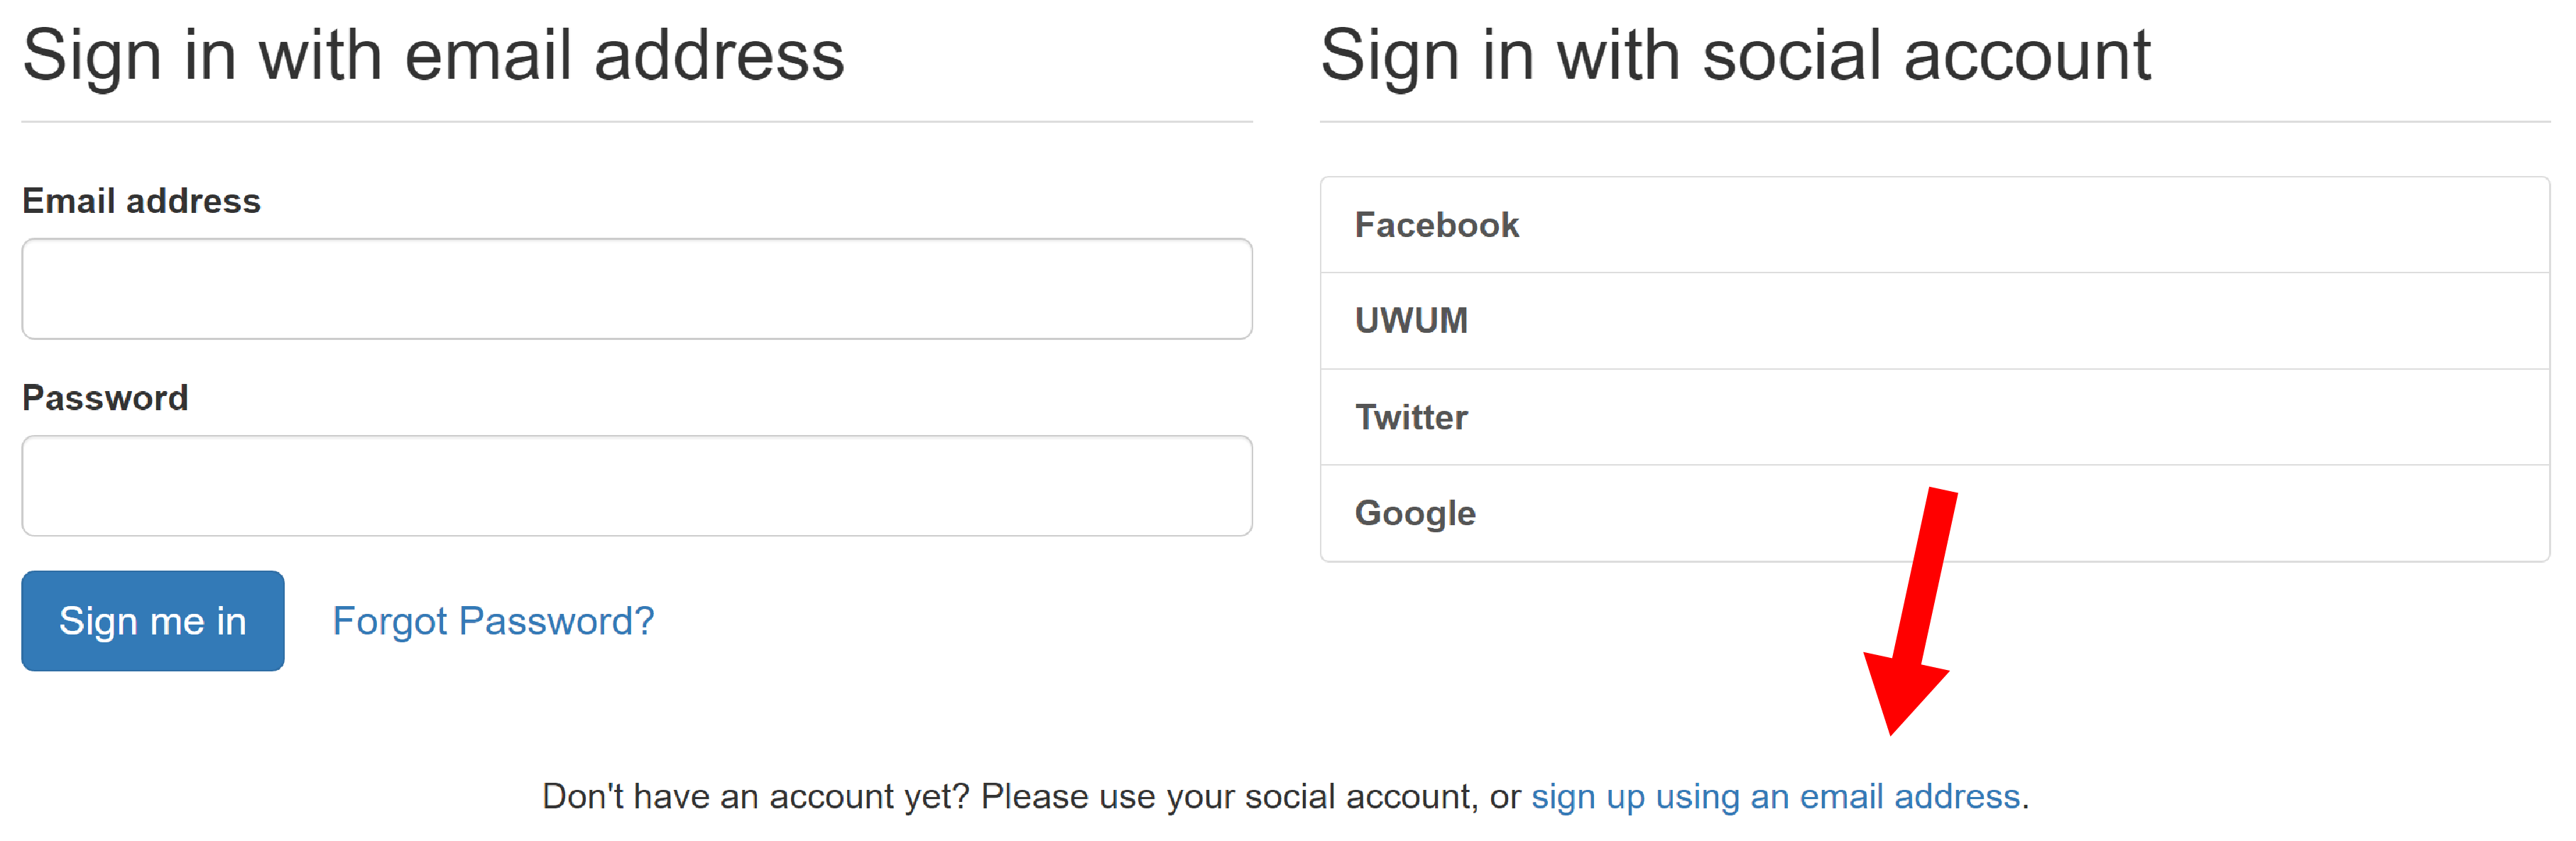
As a registered user you can log in and set up a Sapelli project within GeoKey.
- Within the GeoKey admin dashboard, select the Sapelli Extension from the right pane.
- Add a project by clicking on the ‘Add project’ button.
- Upload the Sapelli .sap file by browsing in your directory and the selecting Upload.
NOTE: If you want to run a test with one of our provided demo sap file, please make sure that you change the name and project id in the PROJECT.xml file. GeoKey does not allow exact duplicates on the server. - You should see that the project has now been successfully uploaded and data collected via the Sapelli app can be uploaded to the project via the phone.
- Your new project will appear in the ‘Project list’.
- Clicking the button ‘Manage project’ allows you to fine tune project specific settings, such as:
ACCESS RIGHTS (Manage Project -> Settings)
GeoKey allows you define who can access projects and data on a very detailed level. There are two types of projects: public and private. Public projects can be accessed by anyone, regardless if the user is registered and logged in or not. Consequently, all data in a public project is public too. Private projects allow you to restrict access to a selected group of users. Only users that are registered, signed-in and member of one of the project’s user groups have access to a private project. By default all data in a private project is accessible to all members of the project’s user groups. For each user group individually, you can further restrict access to subset of all data in a project.
USER GROUPS (Manage Project -> User groups)
Through user groups, you assign roles to its members. In GeoKey there are four different levels of user roles: Administrators can access all data of a project, they can moderate and contribute as well manage the project. They can create and edit categories and their fields, create and change user groups, including adding and removing users and granting permissions to user groups. Moderators can moderate all data they are allowed to access. This includes editing and deleting contributions, comments and attached media of other users as well as approving pending contributions. Moderators further can contribute to the project. Contributors can contribute to a project and read all data they are allowed to access. They can edit and delete their own contributions, comments and attached media. Read only users can only access data they are allowed to.
PROJECT LOCK (Manage Project -> Settings)
Projects can have two states: locked and unlocked for structure editing. Sapelli projects are locked by default, which prevents users from modifying the structure on GeoKey with the consequence that data cannot be sent from Sapelli anymore. Important: If you want to change the structure of a Sapelli project, you need to do this in the PROJECT.xml file and thereafter re-upload the .sap file to GeoKey. Note that this will result in a new project due to the possible structural mismatch of previously collected data.
Further information on the basic concepts of GeoKey can be found here.
Configure GeoKey receiver in Sapelli
Once you have successfully uploaded a Sapelli Project to GeoKey you can set up automatic data transmission from your Sapelli client:
- Click on Transmission from the menu tab and slide the Send Data button so it’s set to green.
- Select GeoKey server as a receiver type from the options provided.
- In the pop-up window click on New to choose the receiver type and select GeoKey from the options provided.
- Here you will need to type your server url running GeoKey.
- User credentials are required if the GeoKey project is set to private.
- Choose a memorable name for the receiver, then click OK.
- Once the receiver is set-up, choose how regularly you would like to send data via the interval schedule
- Once this is set data will be transmitted at regular intervals (given the phone is connected to the internet).
Integration with other software
GeoKey provides an open REST API that allows developers to create custom applications to analyse and visualise the collected data. Here, you can find out which API endpoints to use to get information on projects and how to add, read and update contributions. An out-of-the-box web mapping solution that integrates with Sapelli is Community Maps.
Integration with Community Maps
Community Maps has been developed by Mapping for Change as a web based application that visualises data added to GeoKey (either from Sapelli, Community Maps itself or from any other app). It offers an intuitive, multilingual interface with data filtering and modern clustering capabilities for large data sets. Users are able to design their own maps and visualise their data on various devices – from big screen desktops to tablets and mobile phone clients. Further features supported by the software include email notifications about data activity as well as personalisation and branding tailored to their project/company.
If you are interested in using Community Maps, send an email to: info@mappingforchange.org.uk